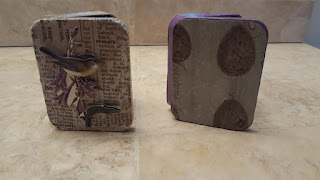
Collage work is somewhat of a slow process for me. The cutting and gluing doesn't take time, but the pawing through papers, deciding on color schemes, finding inspiration from objects, and time to dry between paint layers makes for a project that needs some space to breathe on the table between bursts of energy. As a result, I tend to work on 2 or 3 small collages at once, painting one while the mod podge on another dries, etc...
Here are the tins I start with:
(The vermints are my favorite kind)
They have a glossy exterior, so I begin by roughing up the surface with a little sand paper so that the mediums I work with will adhere better. On this go-around, I also discovered that the lids can be completely removed and then later reattached (at least on the vermints tins, I haven't tried the Newman's Own one yet) This made sanding, painting, and gluing quite a lot easier to manage.
After prepping the tins, I began to go through my many boxes of various supplies looking for papers, trims, and dimensional objects to fit the general springy ideas. I rarely have a specific end image in mind when I begin, I let the collage evolve through the process based on what supplies jump out at me. Sometimes I begin in one direction and then turn around entirely partway through.
In the midst of the project, I gather supplies and dry-fit the bits before gluing anything down. In this instance I'd started with a somewhat pink/green tin for one, but it just didn't look quite right with the papers I'd picked for the inside. I was eventually inspired by some newsprint-looking tissue paper in my stash, and changed the whole exterior to a neutral beige
Here are the exteriors of my first finished tins
And here are the interiors:
The one on the left began with the fairy paper, and grew from there. The one on the right started with the "Phogotraphy Studio" and my little owl French feve. Though these were originally meant to be Easter/spring decorations, I think the photographer studio tin will wind up having a year-round home on my mini-art shelves by my kitchen sink.


No comments:
Post a Comment