
(I'm fortunate that my co-host doesn't seem to mind my enthusiasm for themes!)
For much of the theme, I was able to draw from our existing inventory of Halloween decorations, it was simply a matter of grouping and organizing. I had a few projects that were planned and then changed, a couple ideas that came up during the project shopping, and a couple ideas that were scrapped.
So, without further ado... here are the photos from my Very Harry Halloween!

The evening begins with the entrance through Platform 9 3/4. I was originally going to sew a curtain and paint it to look like brick, then I discovered this photography backdrop for only $18.00 (less than what I would have paid for the fabric paint) I purchased the platform decal on online as well, and set it up on my photo backdrop stand. (alternatively, I've seen people mount this in their doorway with a shower curtain rod) The backdrop is vinyl, so I was able to cut up the center without any fraying of the edges. Bonus - no wind on Bunco night, so it hung straight!

Professor Trelawney, at your service! My costume was fairly simple - top and skirt bought online, I removed the last layer of the skirt (which was - of course- too long) and used that as the orange headband, and I wore several long silver necklaces, my own glasses (which happen to be the correct color) and comfortable shoes.
Bonus points for the person who can spot the other fandom in the costume.

The crystal ball is actually used for photography, I did purchase it for the costume and will be using it on future photography outings

The front hall contains the entrance to the Chamber of Secrets and various HP critters

Nagini presides over the Chamber entrance

Looking over the edge of the chamber, it is a long way down.
D made this bottomless pit back in 2009 or so, as soon as I started thinking about a Harry Potter theme, I realized this can be the Chamber entrance. I just wish I could have fit it inside the bathroom!
A few editions of the Daily Prophet and some wanted posters

Spiders flee from the monster which resides in the Chamber

A niffler is ready and waiting for the bunco money

If you have any letters to send, the owls in the owlery are ready to oblige.

Just off the front hall is the girl's bathroom... (simple window pen from the party store)

Moaning Myrtle is a new addition this year, I printed her onto a transparency and put her up using double stick tape

The family room is transformed into Snape's dungeon classroom

Detail of the mantel show the potions and ingredients (I printed the labels and bought a series of tiny bottles from the craft store)
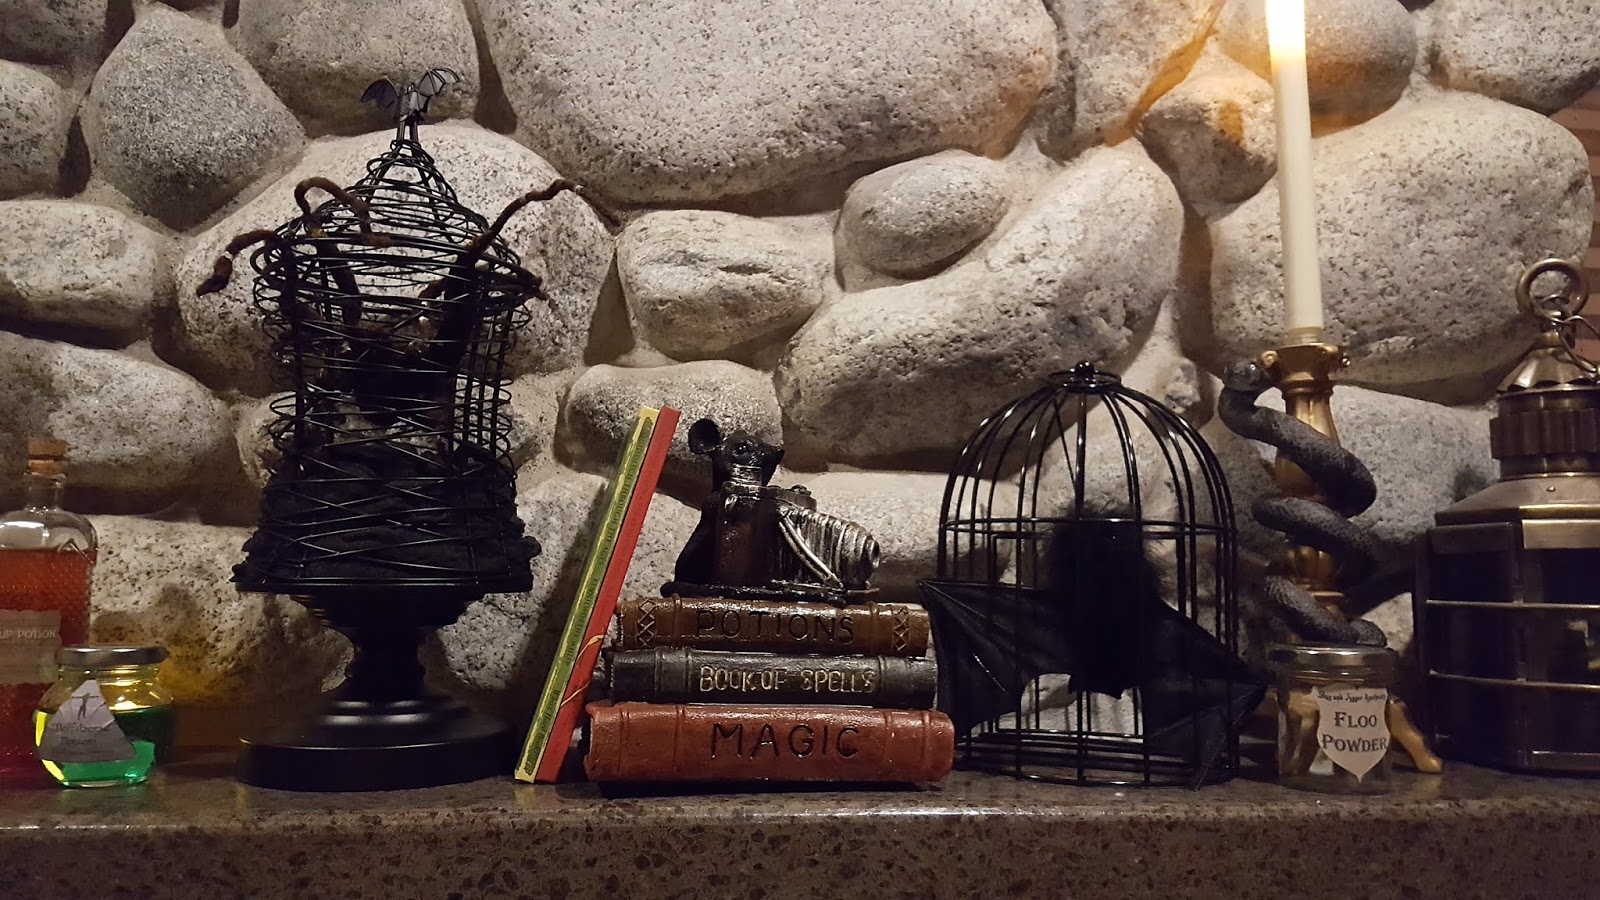
Two of Harry's books (Quidditch through the Ages and Fantastic Beasts) are among the texts on the shelf (I already had these) I did add embossing powder to the floo powder jar after I took this photo

Neville's toad, Trevor, sits beside a bubbling cauldron.
(the potion was created with a rotating pumpkin light and clear cellophane)

The dining room is Aragog's hollow. Done with spider webbing and large spiders which I already had in inventory
The lights in the jars are Fairy lights, similar to what Bill and Fleur had at their wedding. I originally wanted the jars to have moss in them, however the moss was either too see through or too opaque, so I went back to fluffy clouds.

Aragog sits atop the bar


The living room showcases the candles that you would see in the Great Hall, and Hagrid's fire, where his dragon egg is getting ready to hatch

The "scales" wouldn't stick to the styrofoam dragon egg, so I had to cover it with silver tissue paper first, then roll it in the scales. The fire is done in layers... underneath the wood is a rotating orange pumpkin light, the flames are tissue paper glued to an upside down clear plastic cup, each one sits over a flameless tealight candle.

Bats taking off for the Forbidden Forest (not specifically part of the books, but I have them and put them up every year)

Crows hanging around Hagrid's pumpkins (I already had all of these decorations)

On the way to the kitchen you pass the closet under the stairs, where Harry's acceptance letter has been stuck to the door. Inside the envelope is a print out of the letter.

Dinner is served in the Three Broomsticks (I know the brooms don't match the books, but I like the lights. I made the sign by printing the label, aging the edges, the mod-podge it onto the wooden plaque)

Liquid Luck!

Refreshing Gilly Water

Harry's Patronus hangs over the head table (this was a last-minute addition to the decor, it is actually found in the Christmas section of the store. I painted it silver. By the way, see what I did there? Head table? Hahahahahaha)

The score sheets are printed on the 4 house colors, this is how players were sorted into their houses. (in hindsight, it was difficult to see the pencil on the darker sheets - if I did it again I'd put the house emblems across the tops of the sheets and print them on white paper)

Scabbers has been seen skulking around the grounds (A new purchase this year, just a common Halloween rat, I cut off the right index toe)

I couldn't resist this one.
Once the games began, I forgot to photograph the snacks we set out on the tables... I made little signs for them, pretzels were "magic wands", jelly bellies were "Bertie Bott's Every Flavor Beans", Ferrero Rocher chocolates were "Edible Snitches" and mixed nuts were "Dragon Roasted Nuts"
The projects I didn't complete:
Turning the bird cage into a dementor - our bird cage sat in the corner of the living room with it's regular black cover over it. I thought I could add a dementor head to the top, but I couldn't get the dementor to look right before game night.
Monster book of Monsters : I've seen DIY's about making one and they look SO FUN, but I just didn't have the time to do it correctly before game night. I could still make it before Halloween though...


