Monday, April 30, 2012

All Tangled Up

A couple weeks back I followed a post by NPR linking to a fantastic mathematics doodling video.  (I vote that all her math doodle videos are must-see, but my favorite is the one about circles and snakes... probably mostly because it is rich with puns)
Those videos reminded me of the Zentangle books.  Technically I picked these books up for G last year, thinking she would enjoy the step-by-step doodling instructions.  Though she looked through them at first, they eventually made their way into her collection of "how to draw" books...
...until a couple weeks ago, when I stole them.

Zentangle is a fantastically wonderful way to learn doodle patterns - one movement at a time - until they combine to form larger abstract work.  The idea is to go at it free-form... no set plan, no "over thinking" your design.  In other words... pick up the pen and just keep swimming.  It takes the frustration of a "perfect end product" out of the equation, and instead focuses on the joy of the process.

Given how oppressive my month of April has been, this is precisely what I needed.

I grabbed a small drawing pad out of my stash of paper, a retractable Sharpie, and began.

Sometimes I would doodle in between difficult work tasks.  Sometimes I doodled while watching TV.  There were nights were sleep evaded me, and I sat up to finish a pattern or two.  I started bringing the pad with me when we went out, and I would scribble away while waiting for food at the restaurant.  I googled "zentangle" and found a world of patterns and instructions in both video form and written... which opens up the world of exploration immensely.

My very first attempt turned into a Birthday card, which I mailed out without having scanned it... my next three attempts are here:


D looked over my shoulder at my doodling one night, then drove us over to the art store to buy me a set of "real" pens (of varying sizes for greater shading options)  

What I love the most about this is just how soothing it is, to lay out repetitive patterns and add smaller details without worrying about perfection in the end result.  It is a series of smaller projects requiring hardly any supplies, it is easily portable, and can be incorporated into just about all of my other creative hobbies. I'm now working on what will probably eventually be a dimensional project, though I'm not setting my sights too strictly on the end destination.

I'm just going to enjoy the journey.


Monday, April 09, 2012

Eggless Easter Eggs of the Felted Sort

This year's experiment in egg decorating was inspired by my friend H's post about some beautiful wool rovings.... I've always wanted to try needle felting (and frankly needed an excuse to by a box of pretty pretty colors) so I did a little searching around and found out that needle felting eggs is really quite simple.

Get a styrofoam egg.

Wrap it in some wool roving.

Get a felting needle and stab the bajeezus out of it until it sticks.

This is not only a great opportunity to experiment with pretty colors, patterns and pictures, but it is one heck of a stress reliever.  G always enjoys new craft opportunities and jumped right in, however I was pleasantly surprised when also D picked up a needle and worked his creative magic.  Together we felted over a dozen colorful Easter Eggs... so much fun!

Friday, April 06, 2012

What happened to March?

I lost count of how many times in the last few weeks that I thought about doing an update. Unfortunately, my work life exploded with activity and overran my days and nights for much of March.  The sudden barrage of demands did not just attack my time, but my energy... it took so much of me to slog my way through the muck that by the time I'd reach the other side of things I simply didn't have a coherent blog-worthy thought to share.  My true introverted nature turned to retreating to recharge - books to escape into, art projects to distract my mind - and that is how a month slips through the cracks so completely.

Now, focusing on the highlights of the month...

It took a bit of time, and several attempts, but at the beginning of the month I finished a piece I call "Breaking for Lunch"

This is a collage of 6 separate photographs I took of a crow at the beach.  He would take a shell, fly up into the air, then drop it on the rocks below in an attempt to crack it open.  I put the images together by printing them onto transparency sheets, transferring them to water color paper, then painted the whole scene with watercolor paints.

Working on this project was frustrating at times (the transfers didn't always work) but it was incredibly therapeutic.  At the end of the day I could turn my back on my office and escape to the cool basement filled with art supplies and soothing music, and allow the anxiety to drift away.  I enjoyed the process of it... the practicing to get consistent results with the transfers, the challenge of getting all the photos to work on one sheet, the experimenting with color to help convey the tone and texture of the day.  The ATC's I made prior to this carry with them some instant gratification, but having a larger and more detailed project to work on gave me something to look forward to at the end of the day.

At the end of the month, I celebrated my birthday.  To be honest, I was still in such a retreat mode that all I wanted to do was be someplace quiet... no hosting, no party, no cake - just quiet.  Lucky for me, the weather broke the weekend before my birthday, so D, G and I set out to spend a Saturday bird watching/photographing at a nature preserve a little south of us.  I had high hopes for the trip, as I'd heard there was a family of Great Horned Owls living just off one trail.  Some helpful birders had posted on websites as to where to find the nest, but when we arrived at the volunteer center we were informed that the owlets were out of the nest and we'd have to search them out in the trees.

D turned out to be the Master Bird Spotter... while standing on a wooden boardwalk amongst 4 other birders with scopes, we all squinted and squirmed and searched the tangle of tree branches while D glanced up for about 2 seconds, pointed and said "What's that bit brown spot in that tree?"

The larger frame is what my camera saw, this is shot through a 300mm telephoto lens (which illustrates how far the bird was)  I enlarged just the baby owl and put it on the image as an inset so it's easier to see.  The babies are still rather furry looking and have not developed the tell-tale "horns" yet, but they are out of the nest.  I wish I could have gotten a better shot, but I'm still extremely excited to have spotted one in the wild at all.

Another great find of D's was this bittern, hunting in a small pond next to a very populated area:
There were quite a few people walking on the path behind me who never noticed this little hunter at work.... at least, they didn't notice until D said "What kind of bird is that?" and I popped up my telephoto to get a shot.
That is the great thing about birding at a nature park on a busy day, by the way... plenty of other observers to point out creatures that you might otherwise have missed.

All in all, we walked over 4 miles that day, myself carrying around 30 pounds of gear total, and I managed close to 6 GB of photos.  Some of my better photos were of this bittern (the series of shots is already up on my site) some tree swifts, a turtle, a variety of ducks, and several Great Blue Herons.  We also had the pleasure of observing many bald eagles and egrets.  Although they were too far away to get any really clear shots, it was fantastically amazing to watch them fly and interact with each other.  It was absolutely the most perfect way to celebrate my birthday and was exactly what I needed.

Wednesday, February 29, 2012

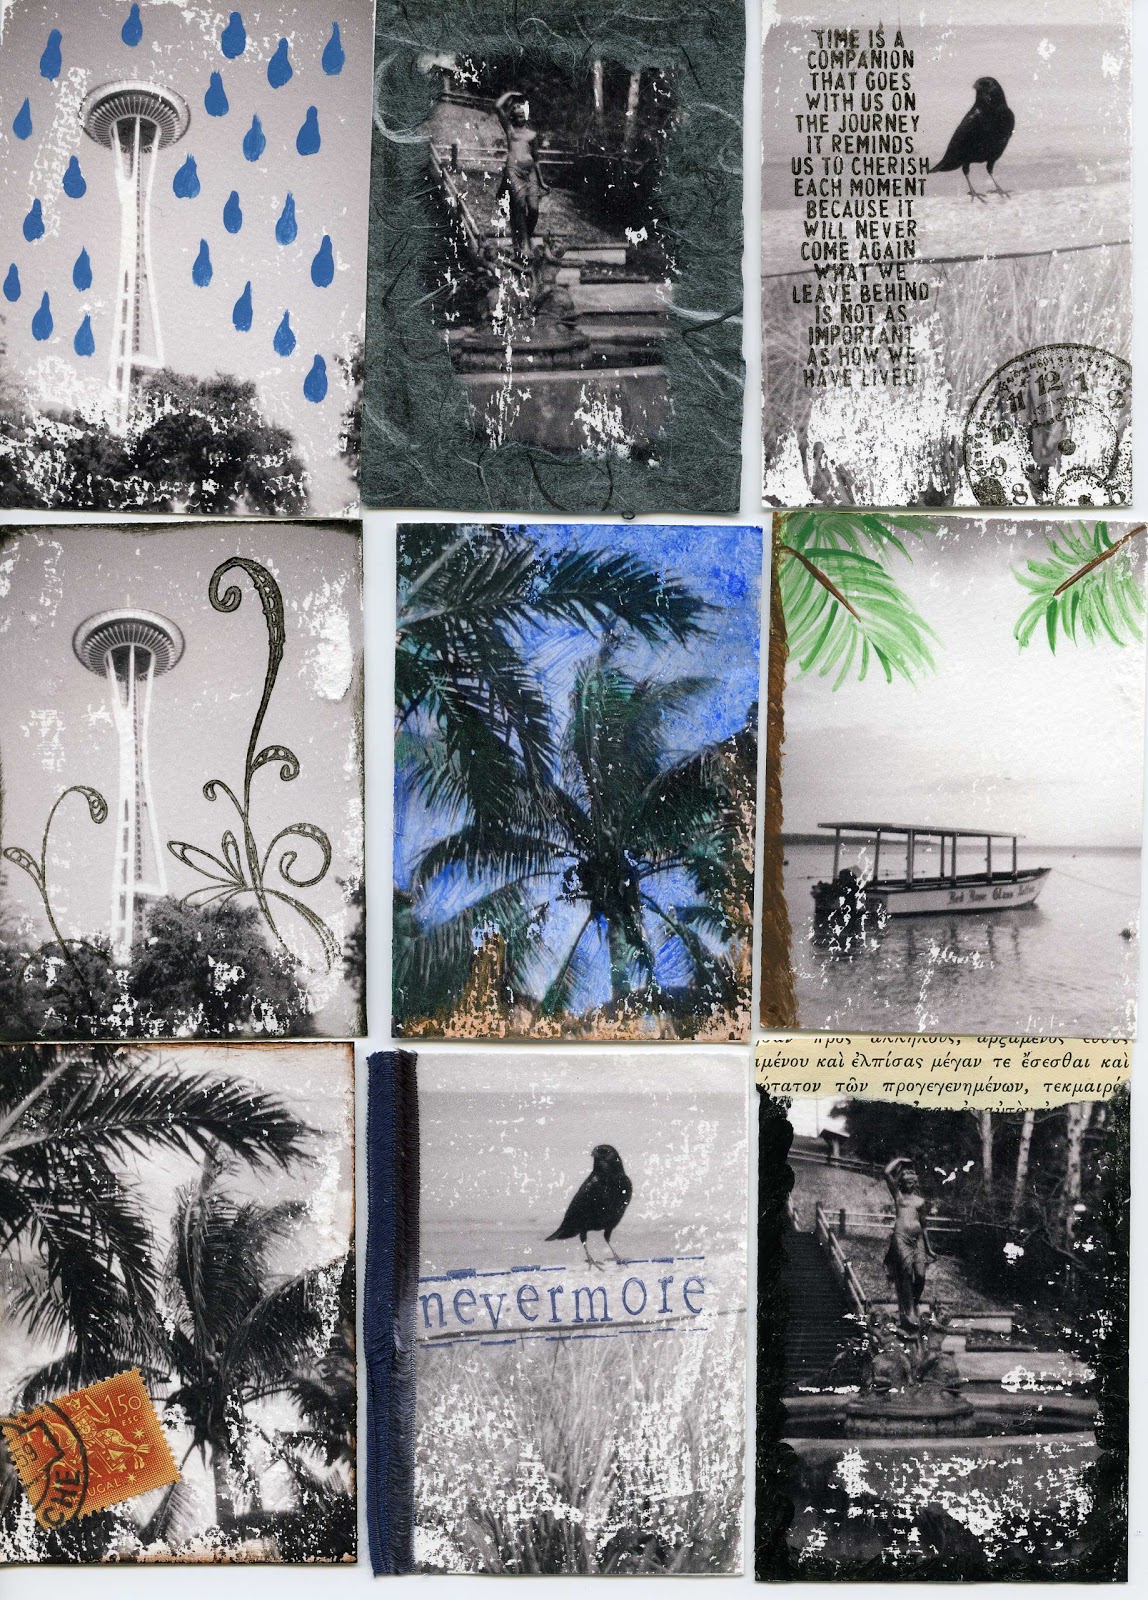
Experimentation in miniature

Over the years I have read through many a craft magazine and art book, picking up bits and pieces of ideas and inspiration to be filed away as a project for a "someday" project.

Some day I will paint my own gift wrap.

Some day I will create a crazy-quilted pillow with intricate stitching and beadwork.

Some day I will do an image transfer onto canvas.

As I was recently researching the web for information on the Impossible Project films (sadly finding out that they have no ability to revive the film that I actually have cameras for) my web browsing brought me to a video showing how to do an image transfer from an inkjet transparency.

This video not only reminded me of my desire to transfer images to canvas, but it also reminded me that I bought a packet of Artist Trading Card (or, ATC) blanks a few years ago and never did create any.  I checked my supplies and found an abundance of watercolor paper, artist medium (I used acrylic matte finish) and inkjet transparency paper... and half a hard drive of scanned black and white images to pick from.

All the supplies needed to experiment without one trip to the store... which I believe vindicates my art supply hoarding.  But I digress....

I chose a few images I thought might make for interesting ATC subjects, printed them out (remembering to reverse the image) and began experimenting.  It took a few tries to get a feel for just how much medium to put on the surface, how delicately to place the image, and how hard to press it down.  In my first few attempts I did not have enough medium on the paper, so very little of those images transferred.  In the video (linked above) she uses a brayer to roll her image, but I found that every time I used mine I would smudge a few parts of the image... so just pressing smoothly with my fingers without shifting the image worked the best for me.  Once I had a few successful transfers, I embellished with a few collage items, stamps, ink, acrylic and watercolor paint... 

I also attempted one larger transfer (which didn't have quite enough medium, but I embellished anyway)


This past weekend I decided to experiment with layering transfers, and using color images with gloss gel medium instead of the matte.  I printed a shot of the EMP (Experience Music Project) exterior and a shot of the Space Needle on a blue sky day and transferred them over, EMP first.

I do like the paint effect of how this medium dries.  What I found here is that, although the images appear quite transparent on the transparency sheet, once they are transferred to paper they end up much more solid.  I thought the EMP would come out more behind the blue sky, but it virtually disappears and the darker portions become muddy beneath the Needle.  I think if I want to layer, at least one of the images needs to be mostly white (to end up clear) so that it stands out more.  Or perhaps I could print them both lighter to begin with.  Or maybe I layer a black and white over top of a color image.

The experimentation shall continue

Friday, February 17, 2012

Home Made Retro Fun

A few weeks ago, D surprised me with a camera kit he found online at a super-cool photography related web store: PhotoJoJo.  (The site gets cool points for their personality... rivals Think Geek!)
For a mere $20.00, the kit came neatly packed with everything necessary to make a brand new, all plastic 35mm Twin Lens Reflex camera, complete with plastic lenses and "very tiny springs" to make the shutter release.

The kit comes from China, and the instructions and manual are translated from Chinese to English.  Badly.  An example...
Given that a few instructions were lost in translation, it took me a little longer than the "allow one hour" time recommended for the building of the camera.  However with just a few moments of back-tracking (and grabbing a better task lamp to work with) I had a finished product in roughly 90 minutes.
I am most impressed with the process of building the shutter release for the shooting lens.  It is triggered with a series of three small springs (two of which were mislabeled in the packaging) and the tension for the trigger is managed by a tiny screw which had to be adjusted *just so* in order to make the shutter click without sticking.  (Part of the reason the build took longer is probably because of the time I spent testing the shutter release)

The dinosaur... in case you're wondering... is part of Photojojo's marketing - every order comes with a Stow-away-a-saurus in the box (labeled on the invoice as "stowawayasaraus - price: RWARR!") He was my buddy through the building process :)

Upon finishing the camera, I loaded her up with some 35mm black and white and took it out for a test drive.  It only took about 10 minutes for me to realize that the viewing lens (top-front of camera) was going to be a thing of inconvenience.  The gasket which was meant to hold the lens in place is smooth plastic, and if the camera was tilted back beyond about 15 degrees (or put in a camera bag, or slightly jostled, or breathed on too heavily) then the gasket would slide backwards into the viewing box, along with the lens - requiring both lenses to be removed and re-set on the camera.  This didn't expose the film at all, but it was a major pain in the ass, particularly since the first time I took the camera out it was only about 37 degrees outside, and my fingers were fairly frozen by the third camera-fix attempt.  On our way home that day, however, D stopped at Home Depot and picked up a small rubber gasket (like what you might use for a garden hose to get a tight seal at the faucet) and I replaced the smooth plastic ring with the nice sticky rubber one.  It worked like a charm... the focus lens has yet to be jostled by even the worst of my clumsy handling.

The following weekend (Superbowl Sunday!) we headed out to the train museum in Snoqualmie to do a bit of shooting in the quiet afternoon.  I managed to fill up the roll with test shots, and popped straight into the darkroom at home to develop the roll immediately.

I found that the focus appears to be fairly accurate insofar as what the focal lens shows, however the lens itself is like looking through a porthole - whereas the film in the lens below captures a rectangular frame.  Therefore, the results with this camera are going to be a bit unpredictable (I know that more will be on the film than what I see in the view lens, but I don't know exactly how much more yet.)  I also learned that the location of the shutter release (on the front of the camera body) makes it a little challenging to hold the camera steady and flat while shooting.  Several frames were blurry from camera shake, but luckily I felt it at the time and took many shots twice to get good focus.

Here are a few of my favorites from the first test run (shot on a thickly overcast day with 400 speed film - I'm extremely happy that the shutter release I built actually works!)


I'm very excited to have a new point of view to shoot in lo-fi... it is interesting to have a different perspective and framing, and it is conveniently compact enough to sneak into my gear bag for future outings.